
What is Keycloak?
Keycloak is an open-source Identity and Access Management (IAM) solution that provides authentication, authorization, and user management for modern applications. It allows developers to secure web applications, mobile apps, APIs, and microservices without building authentication from scratch.
Keycloak supports industry-standard protocols such as OAuth 2.0, OpenID Connect (OIDC), and SAML 2.0, making it compatible with most modern applications and enterprise systems.
Why Use Keycloak?
Instead of implementing login, registration, password reset, multi-factor authentication, and user management separately for every application, Keycloak centralizes these features in one secure platform.
Benefits
- Centralized Authentication
- Single Sign-On (SSO)
- Identity Federation
- Multi-Factor Authentication (MFA)
- User Management
- Role-Based Access Control (RBAC)
- Social Login Integration
- LDAP/Active Directory Integration
- OAuth2 and OpenID Connect Support
- REST APIs for Automation
- Open Source and Free
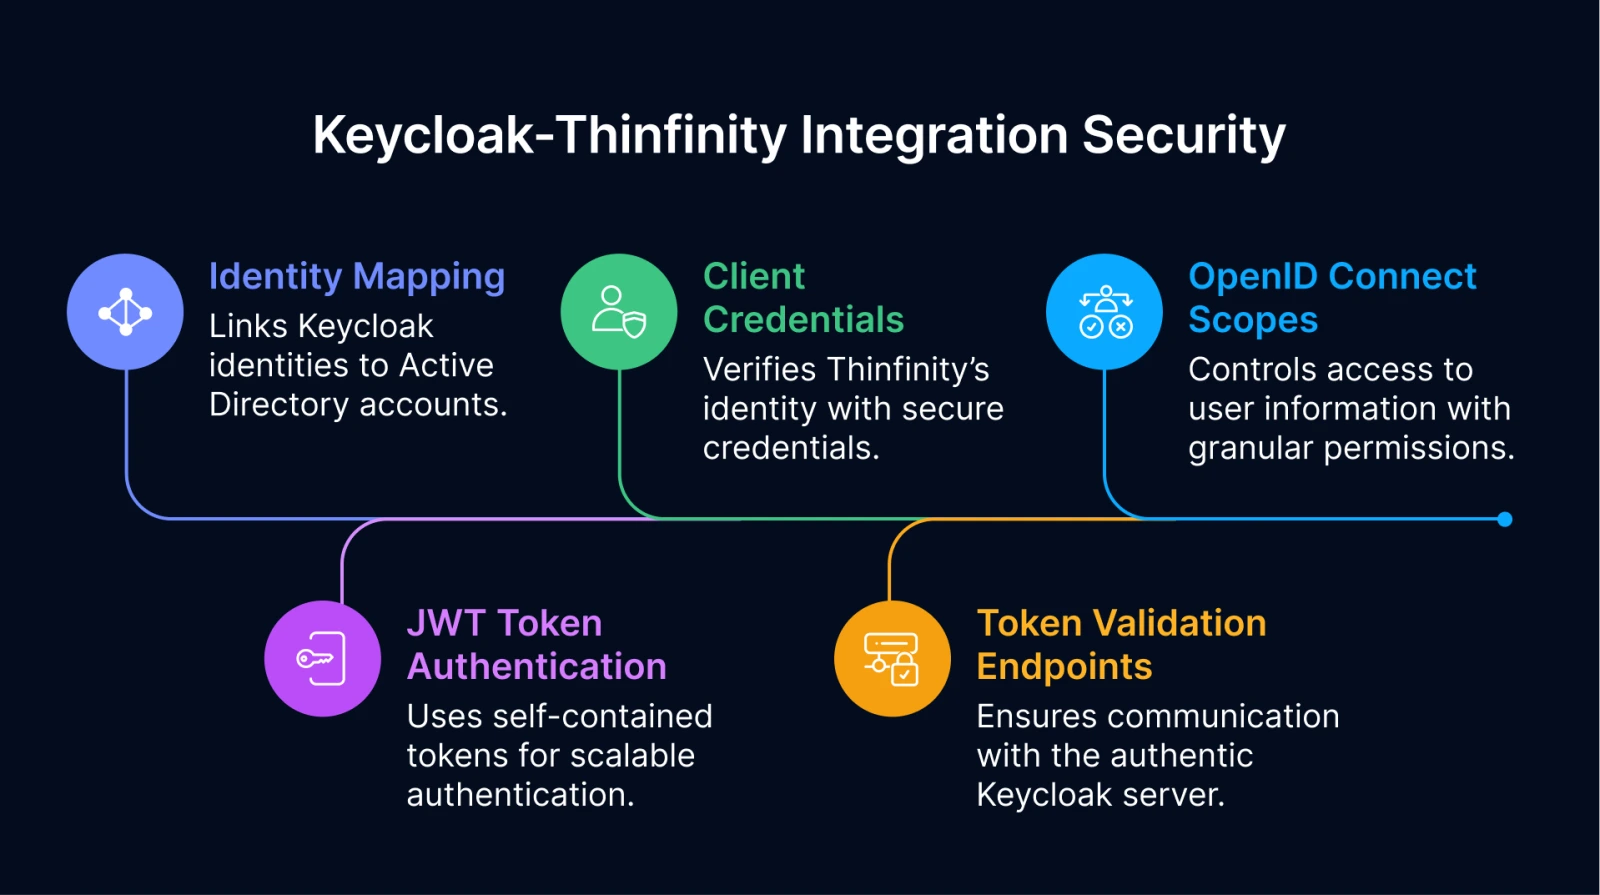
Core Components
Realm
A Realm is an isolated environment that contains users, applications, roles, groups, and authentication settings.
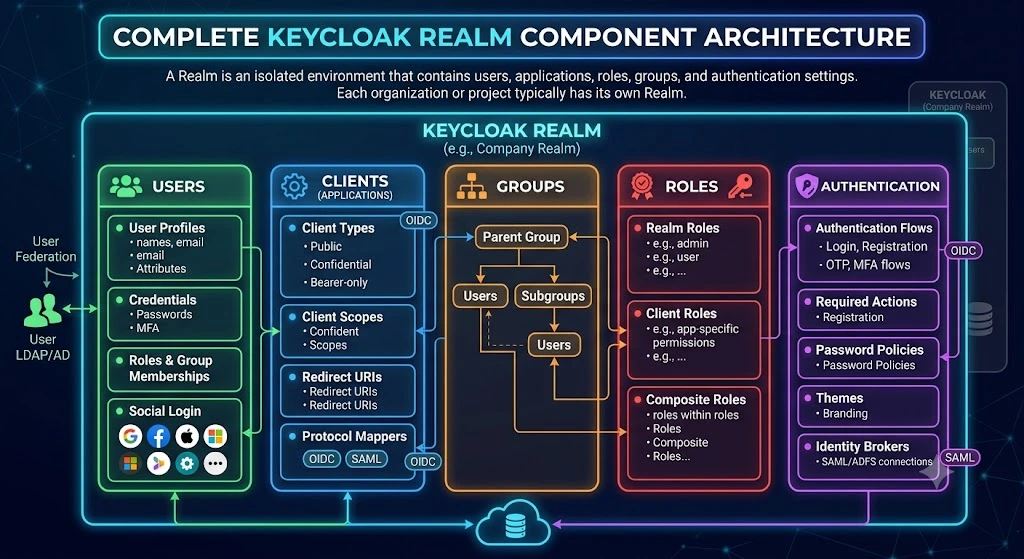
Keycloak Architecture

Installation Setup On Linux
First we will Download the zip file you can also use tar file for keycloak setup but zip file is more easy than tar file.You can download the file using official website.
https://www.keycloak.org/downloads

Note: Recent versions of Keycloak (Quarkus-based) require Java 17 or later. Using the latest Long-Term Support (LTS) version of Java is recommended.
Step 1: Update the Package Repository
Before installing Java, update your system's package index.
sudo apt updateStep 2: Install OpenJDK
Install OpenJDK 17, which is supported by current Keycloak releases.
sudo apt install openjdk-17-jdk -yNote: The Keycloak version in the commands below (26.6.3) is used as an example. Replace it with the version you have downloaded.
Step 3: Extract the Downloaded Archive
If you downloaded the ZIP archive, extract it using the following command:
sudo unzip keycloak-26.6.3.zipThis creates a directory named keycloak-26.6.3.
Step 4: Move Keycloak to the /opt Directory
The /opt directory is the recommended location for installing optional third-party applications on Linux systems.
Move the extracted directory to /opt:
sudo mv keycloak-26.6.3 /opt/Step 5: Rename the Installation Directory
For easier administration and future upgrades, rename the installation directory to a simpler name such as keycloak.
sudo mv /opt/keycloak-26.6.3 /opt/keycloakStep 6: Navigate to the Installation Directory
Change to the Keycloak installation directory before running any Keycloak commands.
cd /opt/keycloakAfter extracting the Keycloak package, you can start the server manually using the development mode. Later, configure it as a systemd service so that Keycloak starts automatically whenever the system boots.
Step 7: Navigate to the Keycloak Directory
Move to the Keycloak installation directory.
cd /opt/keycloak
Step 8: Start Keycloak Manually
Run the following command to start the Keycloak server in development mode.
sudo bin/kc.sh start-dev
By default, Keycloak will start on:
http://localhost:8080At this stage, the server must be started manually each time with sudo permission when the system reboots. To avoid this, configure Keycloak as a systemd service.
Configure Keycloak as a Systemd Service
Step 9: Create a Service File
Create a new systemd service file.
sudo nano /etc/systemd/system/keycloak.serviceStep 10: Add the Following Configuration
Paste the following configuration into the file.
[Unit]
Description=Keycloak Identity and Access Management Server
After=network.target

[Service]
Type=simple
User=root
WorkingDirectory=/opt/keycloak
ExecStart=/opt/keycloak/bin/kc.sh start-dev
Restart=always
RestartSec=5

[Install]
WantedBy=multi-user.target
Save the file and exit the editor.
Step 11: Reload Systemd
Reload the systemd manager configuration so it recognizes the new service.
sudo systemctl daemon-reloadStep 12: Enable the Service
Enable the service so that it starts automatically during system boot.
sudo systemctl enable keycloak.serviceStep 13: Start the Service
Start the Keycloak service immediately.
sudo systemctl start keycloak.serviceStep 14: Verify the Service Status
Check whether the service is running successfully.
sudo systemctl status keycloak.serviceIf everything is configured correctly, the service status should display Active (running).
Output

No comments yet. Be the first to comment!